
Festive Marshmallow Pops
- Nov 10, 2017
- 3 min read
Updated: Jun 8, 2022
These sweet and colourful Festive Marshmallow Pops will add some fun and whimsy to your next party.
If you have been following my blog for a while you would know that the holiday Christmas season is one of my favourite times of the year! So I am excited to begin sharing some fun and festive Christmas and holiday baking ideas that I believe will make your holiday entertaining less stressful and a lot more colorful and fun! I will be posting a recipe for you every week leading up to Christmas and I have a truly fun and easy recipe that you really can get the kids involved into today.
Now tell me who doesn't love a marshmallow - all that sweet, pillow-soft goodness! I have actually made my own marshmallows before and they came out so good (you can check out the recipe for my Homemade Marshmallows here) but for the purpose of today I decided to go with Rocky Mountain marshmallows which are from America but I picked them up at my local cake making store. You can easily order them online too. These are the best choice if you are looking to make something like this because they have a good flavor and a good HEIGHT so you can still see the marshmallow as well as the sprinkles and the overall effect I think looks prettier. The cake-pop sticks can be bought from cake shops, department stores and online too.

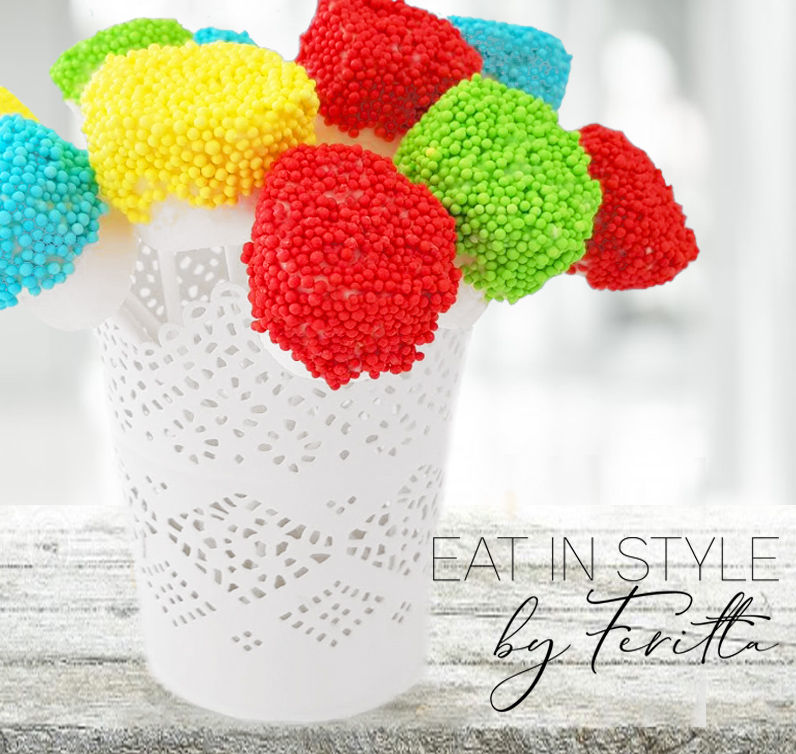
What's great about a treat like this is that you can customize the colors to suit ANY event, Christmas, Halloween (orange/black sprinkles) birthdays - it's so versatile. You can dress them up to suit a more grown-up event and even though I have gone for white chocolate this time you could easily use milk or dark chocolate if you wanted to. Instead of sprinkles you could also use chopped nuts, desiccated coconut, the options are really up to your imagination.
Being organized makes something like this a breeze and I find cups rather than bowls allows me to move the sprinkles around more easily to cover the marshmallows
If using a microwave to melt your chocolate place in a microwave safe mug rather than a bowl so that the chocolate is contained and it is easier to "dip" the marshmallow into the chocolate.
I also found it better to add a couple of heaped tablespoons (roughly) of sprinkles into the mug at a time so that there was less wastage - just top-up your mug as needed
Use a butter/table knife to gently wipe off excess chocolate (as pictured) before dipping into your sprinkles or coating of your choice otherwise the excess will "glug up" your sprinkles in the cup
Use clean fingers to gently press the sprinkles onto the chocolate to smooth it out a bit if you need to to give a nice finish
DO NOT store these in the fridge as it ruins the texture of the marshmallows. Let them set at room temperature and store in an airtight box in a cool pantry

YOU WILL NEED
50g | 2 ounces white chocolate
20 large marshmallows
Sprinkles in the colors of your choice
20 cake-pop sticks
METHOD
Melt your white chocolate according to packet instructions. If using a double boiler pour chocolate into a mug. If you are using a microwave, melt in a microwave safe mug.
Pour your sprinkles into as many mugs as you need depending on how many colors you are doing - a couple of tablespoons at a time is fine - just top up as needed.
Keep a baking tray lined with baking paper (this is where you will place your marshmallow pops to set).
Gently push your cake-pop stick into the marshmallow without piercing all the way through but enough that it will hold and be stable.
Gently dip you marshmallow about half way into the chocolate - you don't have to be too precise as a bit of variation adds to the fun.
Then gently use a smooth butter knife to remove any excessive chocolate - or the sprinkles won't sit smoothly on the marshmallow and will clump up the sprinkles in the cup.
Gently roll the marshmallow in your sprinkles and cover the chocolate with your sprinkles. Use your finger to gently press and smooth any little bumps if you need to.
Set aside on the baking paper covered tray.
Continue until all 20 marshmallows are made.
Allow to set at room temperature.
Serve and enjoy or store in an airtight container in your pantry.
MAKES 20
Tried this recipe? Tag @eatinstylebyferitta or #eatinstylebyferitta so I can see your creations and show you some love ♥
Comments